


 5 Reasons Why Your Business Needs a Mobile eCommerce Application
 Using Salesforce to Improve Your Sales Pipeline: Five Tips
 Cross-Platform Mobile Development: Five Best Frameworks
 How to Develop Custom Accounting Software
 10 Best Web Development Frameworks in 2024
In this blog post, I will tell you how we built a custom Sitecore JSS Snippet component in a project based on Sitecore 9.2 SXA + JSS and explain how it helped solve a client’s requirement.
The Problem
Our client needed a possibility to create reusable macrocomponents from a bunch of microcomponents and use them across pages and sites included in one JSS tenant.
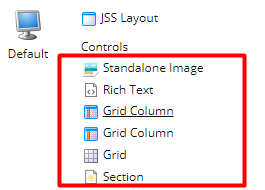
Let’s assume we have the following list of JSS components (microcomponents):
- Section — a root component
- Grid Component
- Rich Text Component
- Image Component.
And we want to build a macrocomponet using these microcomponents as follows:
- Put a Grid with two columns in a Section placeholder.
- Put an Image Component in the Left Column.
- Put a Rich Text Component in the Right Column.

In Sitecore SXA, there is an out-of-the-box Snippet component to cover such cases.

Since our project was a combination of Sitecore SXA and JSS, we couldn’t use the SXA’s Snippet component. We had to develop a custom one.
Solution
The following idea came up to my mind.
- Create a simple JSS Component (aka Snippet) with a snippet-content placeholder inside.
- Create a new JSS Layout specifically to build a Snippet component structure separately.
- Put the Snippet Component (built in step 1) on the main JSS Layout (used for content pages). Select the Snippet Item created separately using the JSS Layout in step 2 as a data source.
- At runtime during the rendering process, check if the rendered item contains a Snippet Component somewhere. If YES — get a Snippet DataSouce, render it and put the rendered result in the snippet-content placeholder.
Implementation
- The first step is quite simple. In our project, we used the Sitecore First approach mode to build JSS components.
In Sitecore, create a Snippet JSON Rendering:
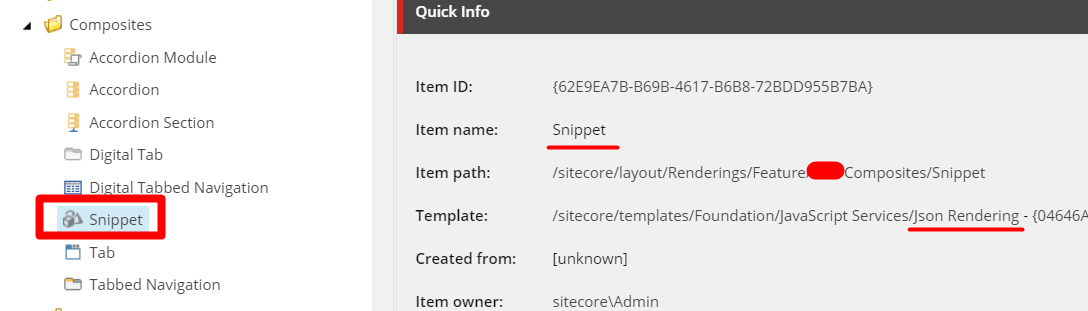
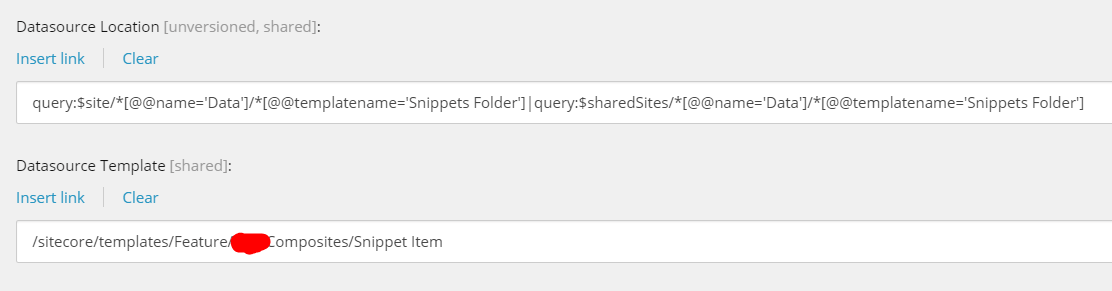
As for the DataSource, create a Snippet Item template inherited from:
* Base App Route template (Path: /sitecore/templates/Foundation/JSS Experience Accelerator/Multisite/Base App Route)

* Global Datasource Behavior template (Path: /sitecore/templates/Foundation/Experience Accelerator/Local Datasources/Global Datasource Behavior)

In the created Snippet rendering, put a data source link referenced to the Snippet Item template.
Then, create a Snippet JSS Component with a placeholder:
import React from 'react';
import { isExperienceEditorActive, Placeholder, Image } from '@sitecore-jss/sitecore-jss-react';

const SnippetComponent = (props) => {

  if (!props.fields) {

      return <h1 className="alarm">Datasource isn't set.<h1>;
    }
    return (
      <h1 className="alarm">
        Data is not provided. Contact administrators, please.
      </h1>
    );
  }

 return(
     <>
        <Placeholder name="snippet-content" rendering={props.rendering} />
      </>
);
}
export default SnippetComponent;
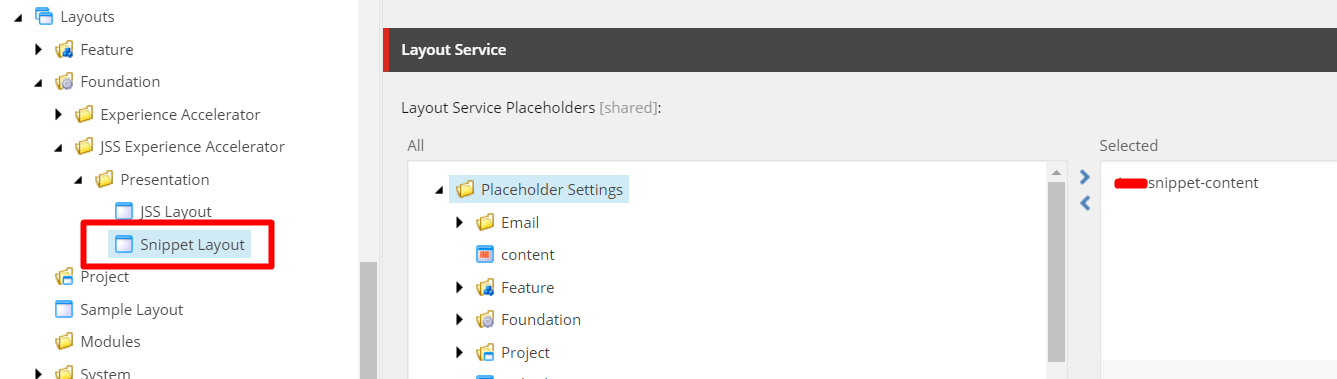
2. Create an additional Layout that will allow you to configure the Snippet data source separately.
In Sitecore, create a new JSS Snippet Layout (just a copy of the existing one) with only one placeholder (in my case snippet-content):
In JSS, add the following piece of code to the Layout.js file:
import React from 'react';
import { Placeholder, VisitorIdentification,withSitecoreContext } from '@sitecore-jss/sitecore-jss-react';
import Helmet from 'react-helmet';

import './assets/app.css';

const Layout = ({ route, context }) => {

return (<React.Fragment>
<Helmet>
<title>
{(route.fields route.fields["Page Title"] route.fields["Page Title"].value) || route.displayName }
</title>
</Helmet>

<VisitorIdentification />

<Placeholder name="jss-top" rendering={route} />
<section className="site-wrapper">
<Placeholder name="jss-main" rendering={route} />
</section>
<Placeholder name="jss-footer" rendering={route} />

{context.pageEditing <Placeholder name="snippet-content" rendering={route} />}

</React.Fragment>
)};

export default Layout;
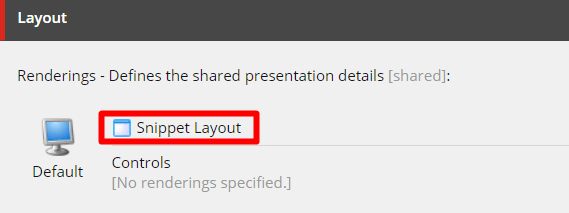
In step 1, we created the Snippet Item inherited from the Base App Route JSS Experience Accelerator template. It means we can use this item as a content page. Make sure the Snippet Item is referenced now to the Snippet Layout we created above.
3. Find the demonstration below in the How To Use section.
4. After some investigations, I found out that the main entry point where it is possible to inject our custom code is the Render virtual method in LayoutService class (implementation of the ILayoutService Interface, Sitecore.LayoutService.dll).

So, to achieve our goal, we need to develop a custom Layout Service inherited from default Sitecore LayoutService and override the Render method to add a logic to find and render Snippets with its data source added on a page:
public class CustomLayoutService : LayoutService
{
public CustomLayoutService(
IPlaceholderRenderingService placeholderService,
ILayoutServiceContext serviceContext) : base(placeholderService, serviceContext)
{
}

public override RenderedItem Render(
Item item,
IRenderingConfiguration renderingConfiguration,
RenderOptions renderOptions = null)
{
return CustomRenderedItem(item, renderingConfiguration, renderOptions: renderOptions);
}
You can find the CustomRenderedItem method implementation here.
To inject the CustomLayoutService instead of the default one, we need to register the following dependencies:
public class RegisterDependencies : IServicesConfigurator
{
public void Configure(IServiceCollection serviceCollection)
{
serviceCollection.AddSingleton <IConfiguration, Configuration>();
serviceCollection.AddSingleton <IFieldRenderer, FieldRenderer>();
serviceCollection.AddSingleton <ISerializerService, SerializerService>();
serviceCollection.AddSingleton <IRenderJsonRenderingPipeline, RenderJsonRenderingPipeline>();
serviceCollection.AddSingleton <IGetFieldSerializerPipeline, GetFieldSerializerPipeline>();
serviceCollection.AddSingleton <IPlaceholderRenderingService, PlaceholderRenderingService>();
serviceCollection.AddSingleton <ILayoutServiceContext, PipelineLayoutServiceContext>();
serviceCollection.AddSingleton <IGetLayoutServiceContextPipeline, GetLayoutServiceContextPipeline>();
serviceCollection.AddSingleton <ILayoutService, CustomLayoutService>();
}
}
and apply the following patch:
<configuration xmlns:patch="http://www.sitecore.net/xmlconfig/" xmlns:role="http://www.sitecore.net/xmlconfig/role/">
        <sitecore>
                <services>
                        <configurator type="Sitecore.LayoutService.RegisterDependencies, Sitecore.LayoutService">
                                <patch:attribute name="type">JssSnippet.Configurators.RegisterDependencies, JssSnippet</patch:attribute>
                        </configurator>
                </services>
        </sitecore>
</configuration>
How To Use
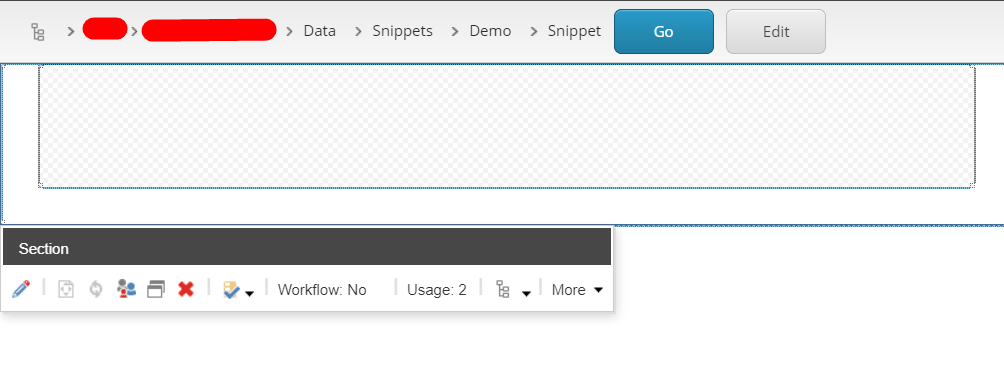
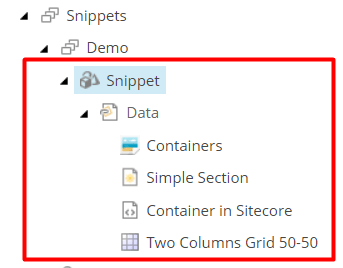
- Create a Snippet item under Data folder of your SXA JSS Site (/sitecore/content/[JSS Tenant]/[JSS Site]/Data/Snippets/Demo/Snippet):

2. Open created Snippet Item in Experience Editor to add microcomponents there:

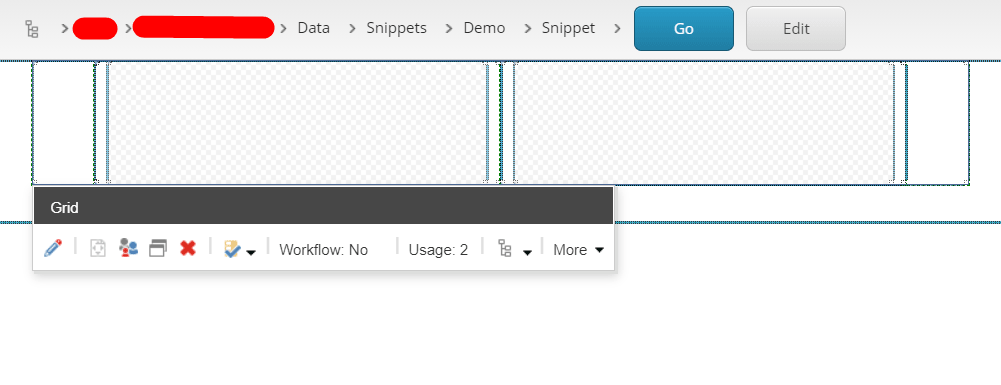
3. Add JSS Components you would like to use as a snippet then. For instance, in my case, I am going to add the Section component, then Grid component, then Column component (2), then Image component (left column), then RTE component (right column):
Section:
Grid with two Columns:
The image in the Left Column:

Rich Text in the Right Column:

Ok, now we have our Snippet data source with components inside:
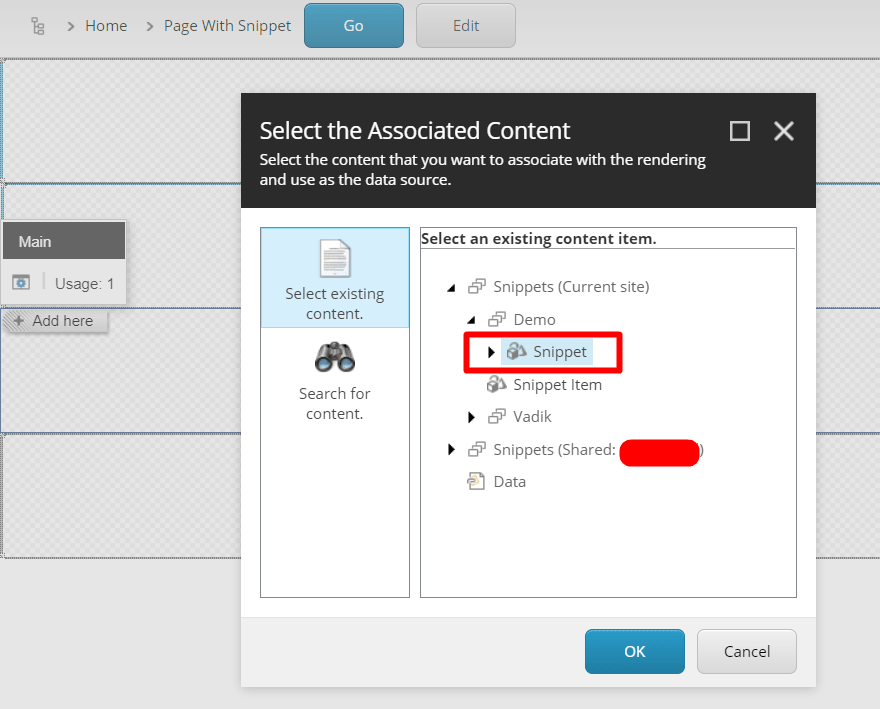
4. Now, it is time to add the Snippet to a site page. Open a content page in Experience Editor and add the Snippet Component in any placeholder you need:
And here is the result — we’ve got a Snippet component with Microcomponents inside.
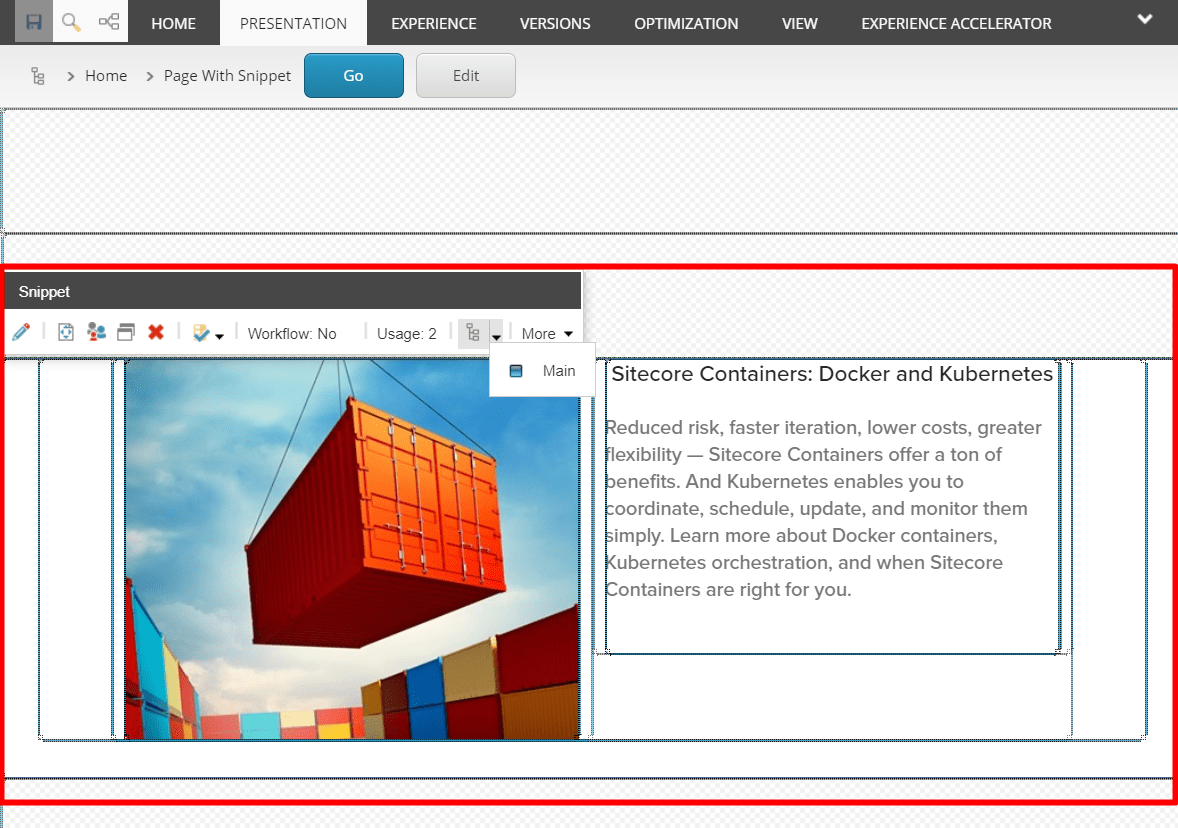
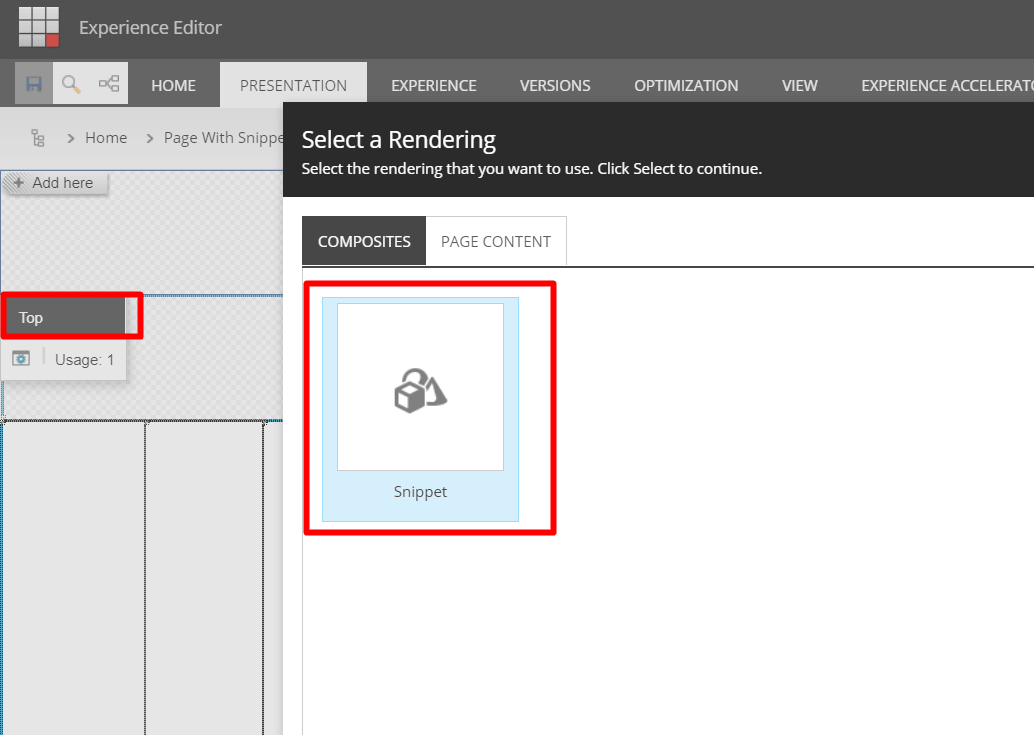
5. Let’s put the same snippet on the Top placeholder on the same page.
And now we have a reusable feature — two Snippets on the page.
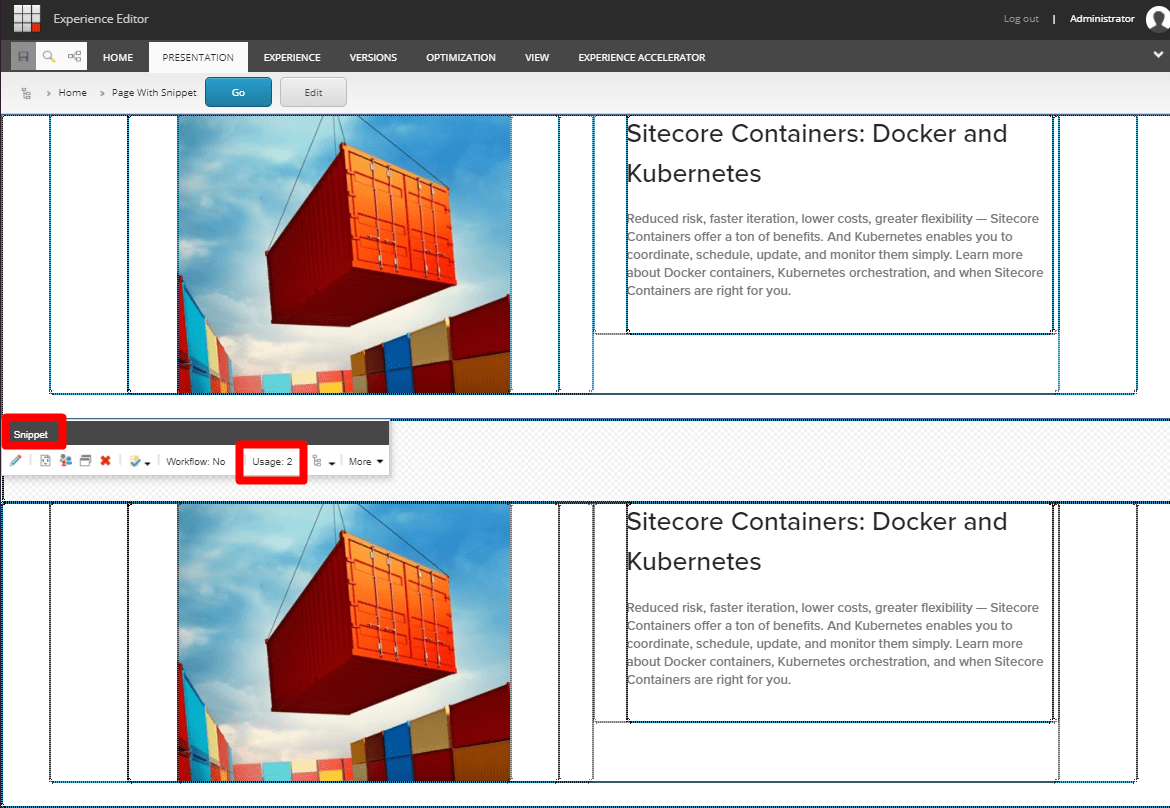
Let’s check the presentation details for this page.

6. There is also one feature in the SXA’s Snippet, such as Global Data Source Behavior. Our custom Snippet item also has this approach (inherited from the SXA template — /sitecore/templates/Foundation/Experience Accelerator/Local Datasources/Global Datasource Behavior)

7. Probably, you have the following questions:
* Is it possible to Edit components that are inside the snippet directly on a content page? — Yes, it is.
* Is it possible to Put another snippet to an already created one? — Yes, it is. As of now, there is only one restriction — you are not able to put the same Snippet inside.
* Do the Sitecore Personalization Rules work with Snippets? — Yes, they do.
* Can I contribute to it? — Sure, just make a fork and help me improve it.
That’s all for today. You can find the implementation in my GitHub.
Feel free to contribute.
Happy coding, Sitecorians!

Vadzim Papko is a Sitecore MVP, Sitecore Architect and Chief .NET Technologist at SaM Solutions. Adhering to the principles of non-stop self-development, he devotes himself to Sitecore innovation and popularization. Follow him on Twitter @VadzimPapko and subscribe to his Telegram channel Amazing Sitecore @amazingsitecore


![Sitecore Experience Manager Cloud (XM Cloud) [Complete Guide]](https://www.sam-solutions.com/blog/wp-content/uploads/2022/11/Sitecore-Experience-Manager-XM-Cloud.png)
![Why You Should Upgrade to Sitecore 10 [including the Sitecore 9 vs. 10 comparison]](https://www.sam-solutions.com/blog/wp-content/uploads/2022/09/Why-upgrade-to-sitecore-10.png)


![[TechSpeak] Migrating a Legacy Solution to Helix Architecture: a Step-by-Step Guide](https://www.sam-solutions.com/blog/wp-content/uploads/2021/02/Migrating-to-Sitecore-Helix-Architecture-image-1-1024x660-min.png)


 Top 30 Ecommerce Tools to Elevate Your Business in 2024
 5 Best Tools to Improve Embedded Software Testing
 Why React and Node.js Are the Top Technologies for Creating High-Performance Web Apps in 2024
 10 Best IoT Platforms for 2024
Very nice 🙂
Goran, thank you for the feedback!